How to Modify a Maglite
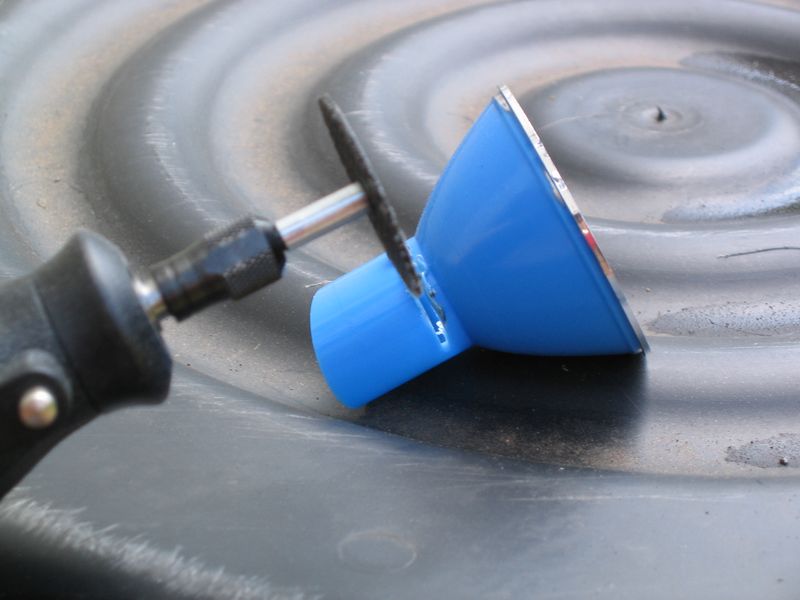 Now that everything is taken apart, it's time to get destructive. So grab your dremel (or hacksaw) and cut off the "throat" of the reflector.
Try to get it straight and leave a few millimeters. The reflective coating actually extends down into the throat a little, so don't cut it off flush with the angled part. |
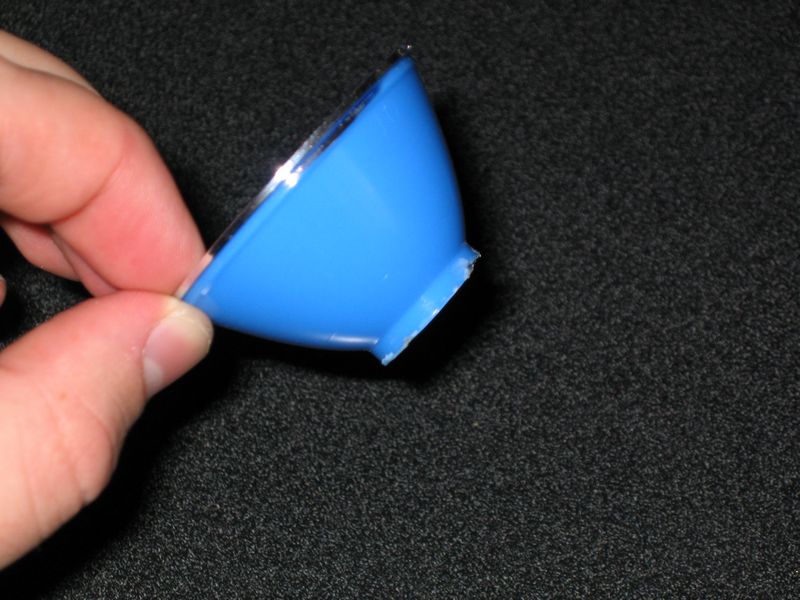 Here it is after the cut, and after I've smoothed it out to get all the plastic burrs that were left after cutting.
As you can see, a small piece of the throat is left. |
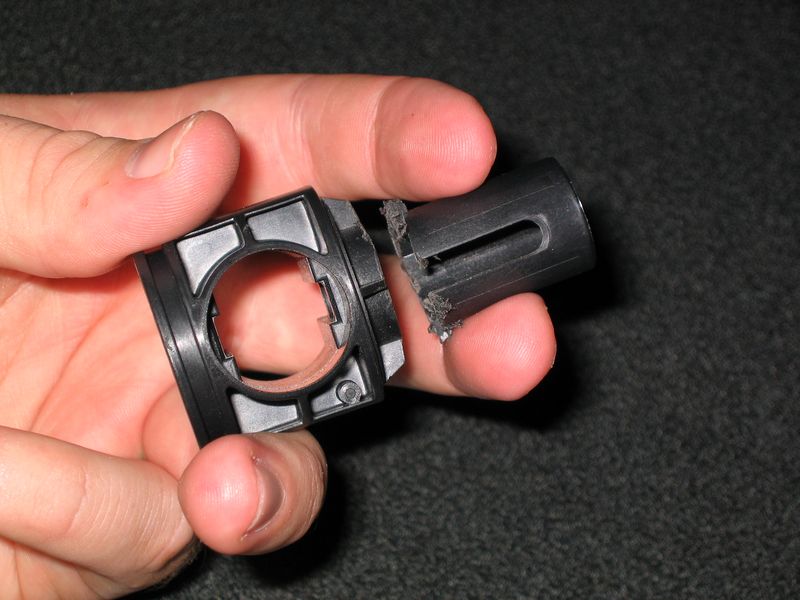 Now we reach the point of no return. Up until now, you could put everything back together and the maglite would still be functional.
But now, we're going to remove the bulb post. Cut it off right at the bottom of the slot in the side. |
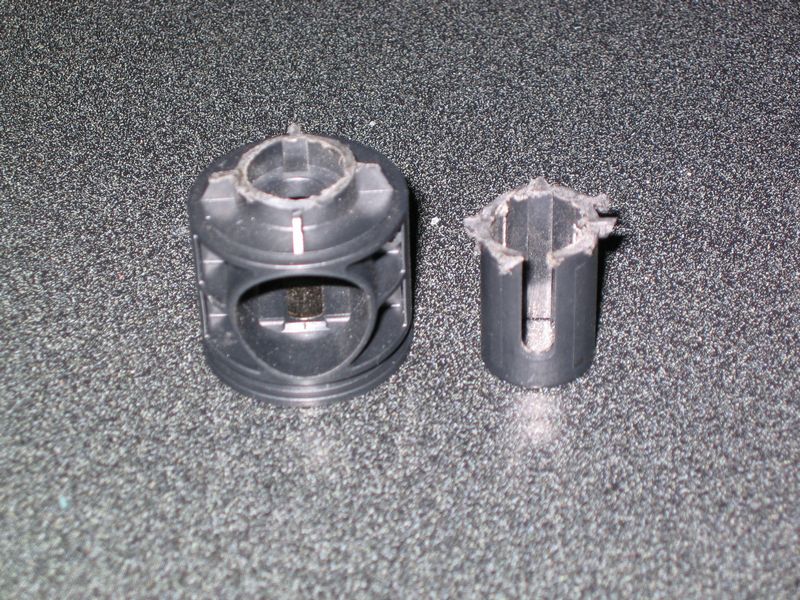 Here's the two pieces. You can throw away the piece on the right (the bulb post) as it's completely worthless now.
|
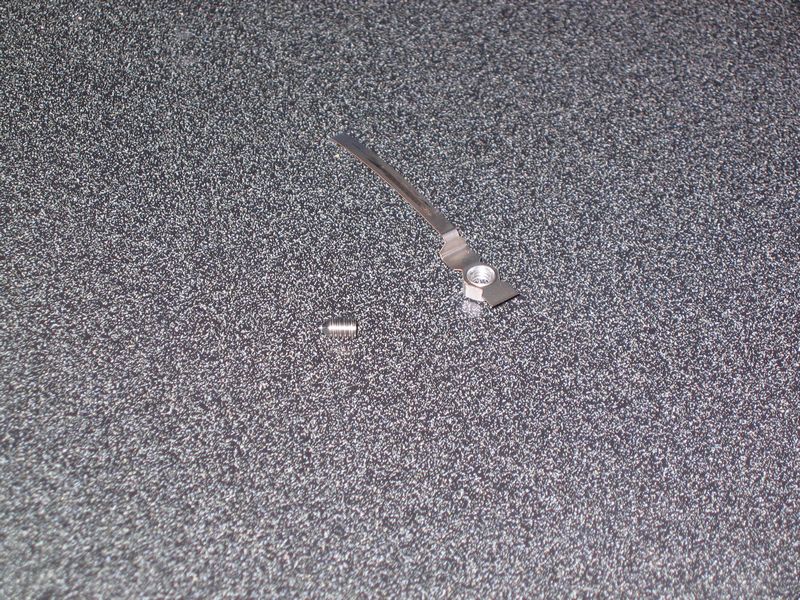 Now find that little metal strip. This piece connects the negative end of the battery to the light bulb. We're going to modify it to connect to the cathode of the diode (The negative lead).
|
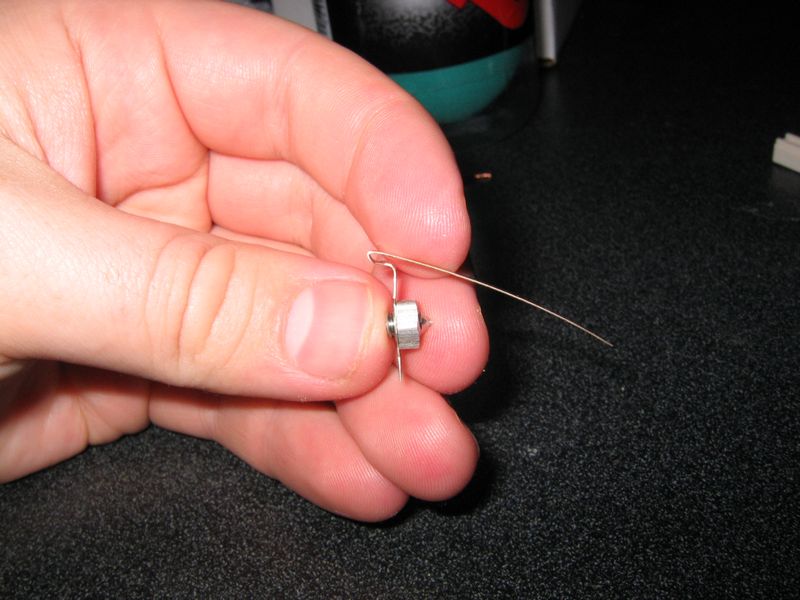 Bend the metal strip as shown in the picture.
|
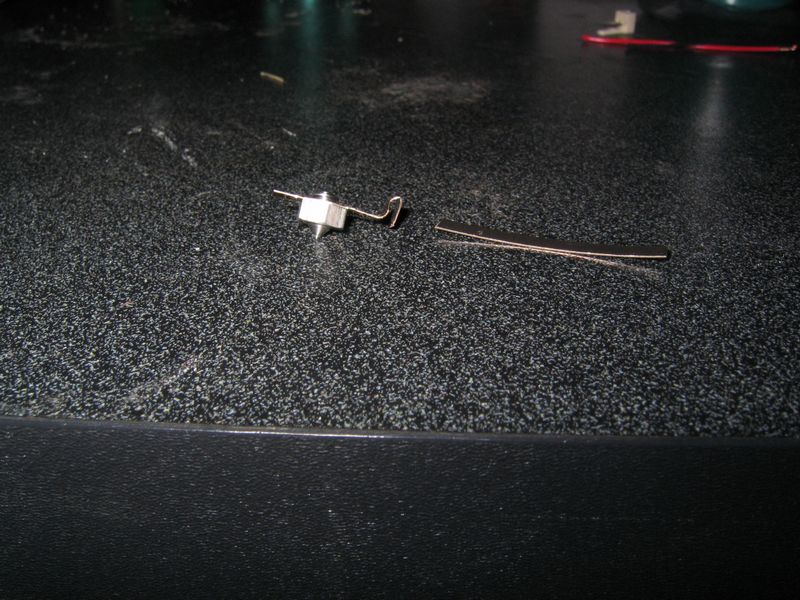 Then take your scissors and snip it off as shown. The long piece is now scrap.
|
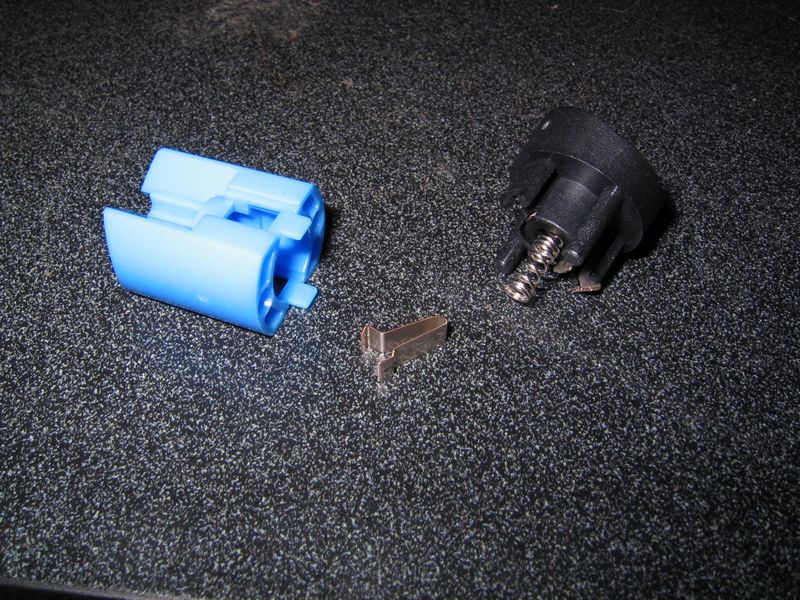 Only one more thing to take apart before we start putting things back together.
Pull the blue part of the switch apart from the black part, being very careful not to lose the spring that's in there. Once you have it apart, remove one of the metal clips. (It doesn't matter which). Now for some assembly! |
| <-- Back 1, 2, 3, 4, 5, 6, 7 Continue --> |